Showing posts with label Skirt. Show all posts

Chevron Outfits

A few months back I bought several different colors of Riley Blake's Chevron fabric, never really knowing what to make from it.
Then, I was so excited when "Project Run and Play" announced that one of the challenges would involve said fabric. My plan was to wait and see what the awesome contestants would come up with and then use their ideas as my inspiration. But, alas! Inspiration struck yesterday all on it's own! I found this lonely dark grey polkadotty pillow case and figured it might go well with the grey and white chevron.

I decided to make a striped skirt with a shirred waiste. That was it, no more. But, sometimes, when you have an idea but no real plan things will turn out different than you thought.

I used 6 inch wide strips for the skirt; four of each fabric and shirred the top with seven rows. Even after seriously steaming the shirring for a LONG time, the skirt was way too wide.

So, I decided to add a belt. The belt is about 1 inch wide, has a 4 inch elastic section in the back and closes up with a button in front.

After that, the pictured model requested a shirt to go with it. Never mind that I only had 8 inches of the chevron fabric left, and none of the pillow case. After much thinking, I took a plain white shirt and added ruffles to the top of each sleeve and sewed on a little red button in front to match the bigger ones on the belt.
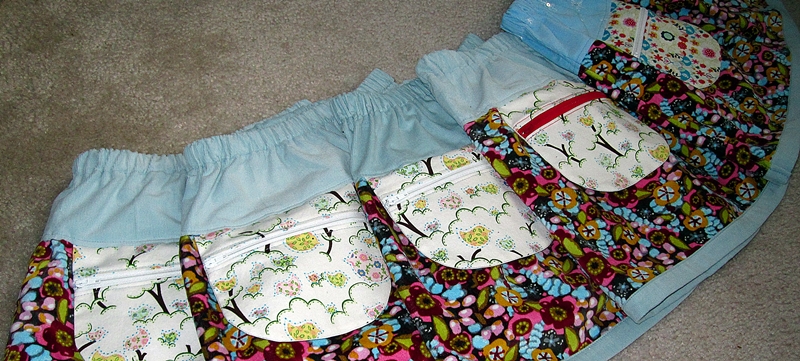
Love the pockets!
I think, the whole outfit came together quite nicely. Now, I am off to make the second one.
 
Update:
 
The second outfit is done, too. Along the way I added two more belt loops on the front of both skirts and also added a triangle to cover the deep V-neck on the T-shirts. They look much cuter now and tie the outfit together.


Crochet Edge Skirt

Hello!!! I am still here.
I have been sewing quite a bit over the past weeks, but do not always feel like taking and editing the pictures.
Today, I just want to show a few pictures of a new set of skirts I made for the girls. They are made from pinwheel corduroy that I found in my stash.
The things, that are different and special about these skirts are the exposed zipper and crochet border around the bottom edge.

I purchased the zippers here. They have a ton of different colors and shipping took only about 10 days. Considering the store is located in Hong Kong, not too bad.

The edge is two rows of single crochet stitches. To get a row of loops to start with, I simply used embroidery thread and used a running stitch all the way around. I made sure to make it rather loose, so it wouldn't bunch up later. The fluffy yarn was left over from these Hello Kitty hats.

Ruffles everywhere skirts and ironing board cover

A few weeks ago, right around my birthday, I won a Free Spirit giveaway and received SIX (6) yards of fabric. Yes, six whole yards. They were all from the "Katharine's Wheel" line by Nel Whatmore.
I almost never get several prints from one line, so I was super happy to have received this much matching fabric!

Here is what I made from it:
New skirts for the girls with LOTS of ruffles. These two skirts used up a total of 4 yards.


The skirt has two layers.


All is topped off with a cute fabric bow. I made them a bit longer so they  will last a couple of years.

And for me: a new ironing board cover. I followed Mandy's recommendations on how to make it. I used almost one yard of fabric for the board. Mine ended up being pieces together, but you can hardly see the seam.


So, that leaves one yard left over. I have no plans for it yet, so it goes into my stash. At least for a little while.

First Day of School and Picture Display

So, Tuesday was the first day of school. Where has the summer gone??? Seriously!
To celebrate the first day of school, our kids get a "Schultuete" filled with supplies, gifts and candy every year. For the girls it was actually their first, since they are now Kindergartners.


The skirts also got finished in time. They look really cute I think. I have also washed them since that picture and was surprised, that the pleats held up during washing and drying. I only had to iron the ribbon trim on the bottom a bit.


Now on to a little project. To preserve our summer memories I made a new picture display for the girls' room.

To re-recreate this picture frame, you will need a wooden frame, spray paint, thumb tacks, any kind of ribbon or string to wrap around the frame a few times, spring loaded clothes pins and embelishments to glue onto the frame.

I did not take pictures of the process, because it was so easy, that anybody can do it.
1. Spray paint your wooden frame any color you like as well as the clothes pins.
2. Wrap ribbon/string around your frame and secure with thumb tacks on the back side. I used 1 inch wide fabric strips, folded in half length wise and sewn down the middle.
3. Embellish the frame with flowers or other things. I made felt/fabric flowers which I glued onto the frame with E6000 glue.
4. Print some pictures and use the clothes pins to hang them from your frame. I used mini and regular sized wooden ones which I also spray painted beforehand.

Such a display also makes a nice gift for friends, parents, grandparents. Or you can hang it to hold notes, shopping lists, etc. I made a smaller version for the Nanny we had this summer as a going-away gift:


Have a great week. I will be back soon with a small chalk board project.

Summer Project - Design your own fabric II - Make stuff with it

My post titles are getting more original by the day... ;-)

I had a couple of hours of free time this weekend, while hubby and the kids went to the zoo. I decided to start "making stuff" with the fabrics the kids had made last week.

I turned some of Yanic's into reusable snack bags for school and a pencil case. The snack bags are lined with ripstop nylon.


And while I was at it, I made some for the girls too. All in varying sizes. The biggest is the size of a regular ziplog sandwich bag.

This is Yanic's new pencil case. I used the front of last year's and replaced the back and bottom with his fabric.


And here is one of the skirts. The second one is not quite done. So, because of that, no model shots either, yet.
I have to say, I LOVE IT? I think, it's so cute.

I did not use a pattern. But, I have seen so many skirts with boxed pleats lately, that I wanted the girls to have one too. I think, this will be perfect for the first day of school.

Pretty ribbon finish on the bottom:


 Cute piping and fun buttons in front:

And the back:

Three Quarter Circle Skirt

The girls' all time favorite skirts are not doing it anymore: too tight, too short. However, they lasted a full 3 (!!!!) years.

So, they needed to be replaced with something similar. Since I still had this huge stock pile of left over jersey knit from other projects, I decided to use it up. Unfortunately, I did not have enough to make two full circle skirts. So, 3/4 of a circle had to do it. They are not quite as twirly, but I think the girls don't really care. One quarter section has four different ruffles sewn on top.

I made a yoga-pants-style waistband and re-used pockets from another skirt, that was getting to small.
I told the girls they could wear the skirt either way: pockets in front or back: K now ALWAYS wears hers with the pockets in back and A ALWAYS wears hers with the pockets in front. (Sorry, that's funny to me.)

If you are planning to make a circle skirt sometime soon, check out Farbenmix' free pattern. That would save you the calculating part!

Bib Skirts

This must have been one of the most frustrating projects I have done in a while. It's right up there with this bag!

I found this cute and seemingly easy tutorial on this blog. I know, it's free and I should be nice. And the frustration was probably caused on my part anyway.

The recommendation is, that if your child is "normal" to "full size", go with one size bigger, in order for the skirt to fit properly. So, my girls are a size 116/122, so I chose 128/134 and added plenty of seam allowance. Yet, nothing fit at first. My fault, 'cause I should have measured and checked against the size of the pattern pieces.

Anyway, I added triangles on the sides to make the top part wider, and then it worked. But, it just added a lot more time and ripping seams and adjusting the pattern pieces for the inside facing...

Also, I finally figured out how to use the one-step-button function on my machine! Yeah! All it took was 10 minutes of reading the manual. Who'd have thought.... ;-)

So, in the end I am happy with the skirts and the girls like them. Especially, the pompoms. I was able to use only left over fabrics: fleece, corduroy, velveteen.
I also used FOE on this project again. The edges of the pockets are covered with it. If you have never used it before, you should really try. It's super easy to use and makes bindings look really neat.

A couple more projects got finished over the weekend. I will show those later. Have a great start to the week! Did you go shopping on Black Friday??? I did! Yes! First time, ever! And the only store I went to was Joann's! Couldn't pass up the 1.12$/yrd flannel.... ;-)

The "Anika Skirt" in (almost) Mass Production

Phew! Halloween is over! The kids really had fun this year and were very disappointed when it was time to stop trick-or-treating after almost two hours. I don't think we ever collected this much candy at Halloween before: almost 15 pounds between the three of them.

Now, only a little over 7 weeks and it will already be Christmas! Eeeek.

A (long) while ago I bought quite a bit of AH's velveteen print from the Innocent Crush line (on sale, of course) in order to make comfy coats for the girls. The coats are WIPs, but after cutting all the pattern pieces, I had quite a bit left over and decided to make matching "Anika skirts" for the girls.


And after that, I still had a lot left over....
Over the next few weeks there will be birthday parties the girls are invited to and I decided to make the same skirt for all the birthday girls: 3.


All five girls go to the same school and are about the same age. I am thinking, it would be so cool, if by chance all five of them show up in the same outfit one of these days.... :D

Also, Vivi and Franzi are twins, too. Two sets of twins in the same outfit ?! Oh, so cute... Okay, I am getting carried away.
The light blue accent fabrics are baby corduroy. That combined with the velveteen make these ultra-cuddly and warm. Perfect for Fall.

Now, I just have to find the time to finish the coats. I can't wait to show them off. I think (hope) they will be super cute.
But, first I have to fill some custom orders, I received. Yeah!

It's voting time!!!!

I am sooo excited! I submitted my organge lace skirt to Skirt Week at Crafterhours and it made it into the finals! Yippie.


[ Imagine Picture here. The Blogger "picture adder" appears to be on strike. At least for me. Sorry.]

Go on over and vote for your favorite today.
Of course, I'd appreciate your vote for the orange lace skirt. But, hey, no pressure ;-)

A once favorite skirt....

...turned into a new favorite skirt.

I bought this skirt exactly 15 years ago! Which makes it almost "vintage". Huh!
It's made from a really thick, flowy knit fabric and is very comfortable to wear. But, the style!!!! ...or lack thereof.

I wanted to make it wearable again and decided to cut off the bottom part and make it knee length. From the cut off piece I made varying lengths of ruffles and arranged them "randomly" on one side of the front.

Voila! Pretty, new, comfy and dare do I say: sexy skirt.

I have not yet finished the hem. I am not sure if I will. I tried, but it kept being really uneven and puckered a lot. I think I need a serger to do a proper job. Maybe, I will just leave it as is. It shouldn't fray anyway, since it's knit fabric.

LinkWithin

Blog Widget by LinkWithin