Showing posts with label Crafting with kids. Show all posts

Crafting for fall

Where has the time gone???!!! Can't believe it's October already.
We have been very busy with school and sports activities. That left little time for sewing. However, while the boys were away this weekend, I squeezed in some crafting time with the girls.


My interchangeable wreath got a new look and our kitchen window some cute decoration.


The girls helped me with the felt leafs for the garland. They had fun sewing the leaves onto pieces of green felt and then cutting all the way around. Towards the end they were also cutting their own leaf shapes as well.

The center of our garland is a wood shape. Late in the summer I had bought oodles of different unfinished shapes and spray painted them with chalk board paint.

Then I used acrylic paint and outlined each of the shapes. They make great gift tags or name tags, too. My girls have one hanging on their lunch boxes, and I write down little messages each day.

Now, I am working on the kid's Halloween costumes. The girls' are almost done. However, Yanic wants to be a Wolverine! Wolverine, as in the ANIMAL! How am I going to pull this one off? Any ideas?

Summer Project - Make a butterfly net and home

This was probably the last of our special summer projects this year, unless I can think of another one before school starts after Labor Day.
For this one we made butterfly nets out of tule, a coat hanger and a stick. We bent the coathanger to resemble somewhat of a circle and taped it to the stick with duck tape. Then we the kids handsewed a long tube from the tule and sewed it onto the wire circle.

For the butterfly home we used this tutorial. Over the past few days it became home to several butterflies, moths and grasshoppers. Of course, they were all released each night.

Summer Project - Build a boat and have a race

This was another activity the kids had a lot of fun with and it's suitable for almost every age group.
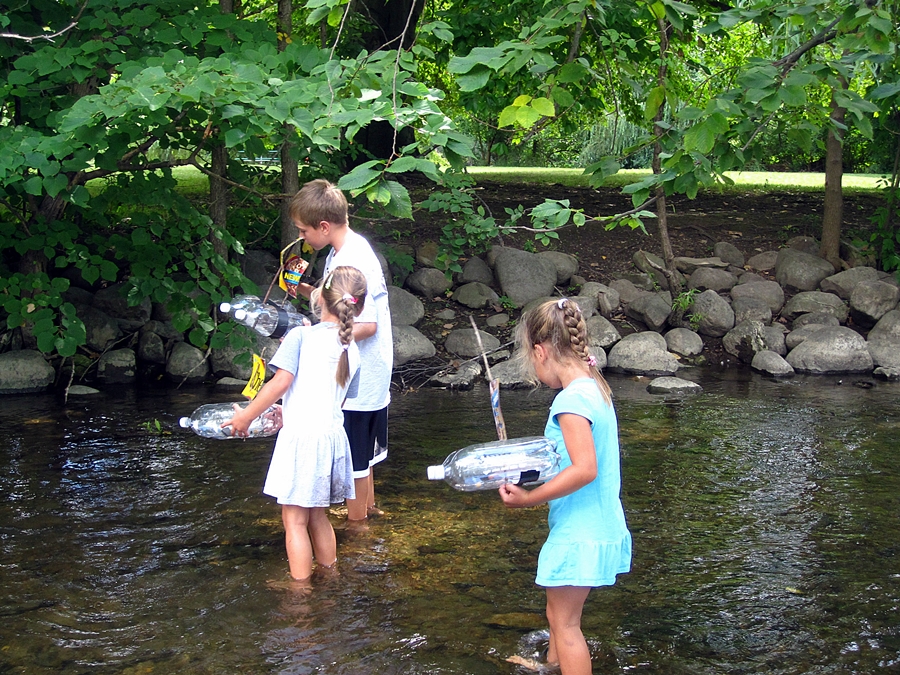
The kids built little rafts using 2 Liter plastic bottles, duck tape, sticks and a cereal box.


 Aftewards we went to a shallow spot on the Huron River and they let them go down the stream. They were also experimenting with how fast their boats went by putting pebbles into the bottles.


Summer Project - Design your own fabric II - Make stuff with it

My post titles are getting more original by the day... ;-)

I had a couple of hours of free time this weekend, while hubby and the kids went to the zoo. I decided to start "making stuff" with the fabrics the kids had made last week.

I turned some of Yanic's into reusable snack bags for school and a pencil case. The snack bags are lined with ripstop nylon.


And while I was at it, I made some for the girls too. All in varying sizes. The biggest is the size of a regular ziplog sandwich bag.

This is Yanic's new pencil case. I used the front of last year's and replaced the back and bottom with his fabric.


And here is one of the skirts. The second one is not quite done. So, because of that, no model shots either, yet.
I have to say, I LOVE IT? I think, it's so cute.

I did not use a pattern. But, I have seen so many skirts with boxed pleats lately, that I wanted the girls to have one too. I think, this will be perfect for the first day of school.

Pretty ribbon finish on the bottom:


 Cute piping and fun buttons in front:

And the back:

Summer Project - Design your own fabric

Today I am sharing another project the kids really had fun with: stamping a design on fabric.

We used white twill and dyed it pink for the girls and blue for the boy. I tried really hard to dye the fabric in an ombre pattern. It did not come out exactly the way I wanted it, but it's still okay.

We used handmade stamps, but any stamp will work. I used regular erasers and glued them onto scrap pieces of wood.

Depending on how old and coordinated your kids are, you may want to check any controlfreaky tendencies at the door. At first I tried to tell them where exactly they had to place each stamp... but quickly gave up.
They had their own idea of what looks good and eventually I just let them be. So, each of them created their own unique design and they are happy with it.


The girls' fabrics I will turn into skirts. For Yanic's I am thinking snack bags and pencil case for school. Hopefully, I can show the final products soon.

Summer is really winding down now, but I have a few more summer projects to share. Stay tuned.

Summer Project - Build a Fairy House

Whether you believe in Fairies or  not, this is a fun project nonetheless.

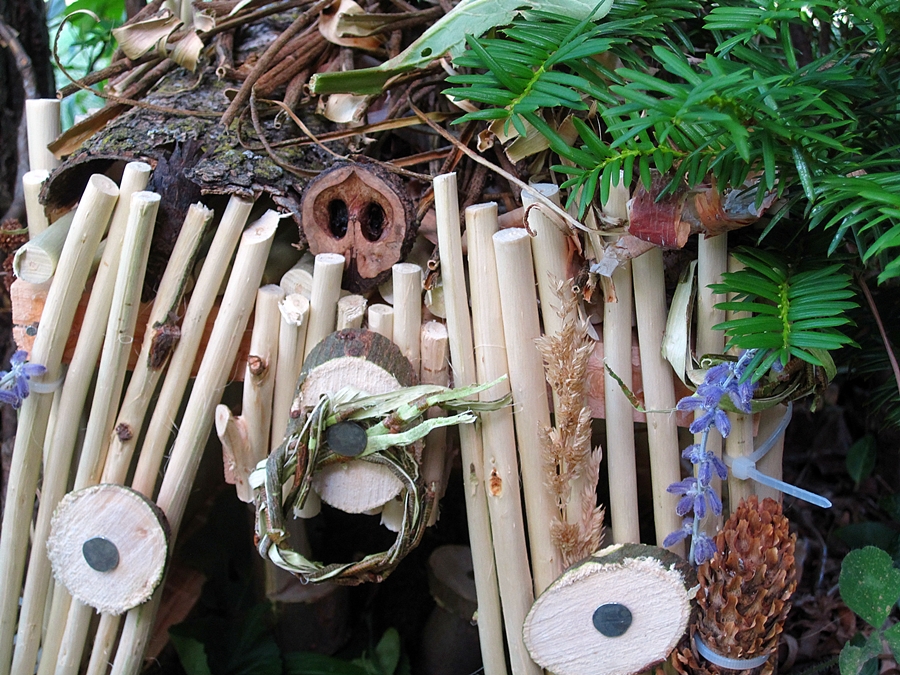
We started with a nature walk and collected as many sticks, bark, acorns, pinecones, grass, flowers etc. as we could. Basically, anything goes for this project.

To build the actual house, we used twigs from our willow and lots of glue, some nails and, YES, zip ties. Everybody had fun pitching in, even the 10 year old.

We then put the house in a shaded spot in our back yard and the girls went crazy decorating it.


We even made pint sized chairs and a table. Lots of moss and leaves on the floor, so the fairies can be comfortable.

I think it came out really cute.

Now, the girls are checking every morning to see if fairies had been there over night.
And wouldn't you know it?! This morning they found a half eaten raspberry on the table.... ;-)
Even if no fairies or gnomes show up, it still makes a nice outside play house for small dolls.

Summer Project - Design your own Tshirt

This was another fun project we did with the kids recently. First time I have used this technique was about 7 years ago, when I made matching shirts for Yanic, my hubby and myself. Totally cheesy, I know.

Anyway, Yanic still remembers the shirts and wanted to make one by himself. The original tutorial can be found here.

Here is what you need:
- a new white (or very light colored) Tshirt
- piece of cardboard to fit inside the shirt, so the paint does not seep through
- some flour
- sandwich zippy bag
- fabric spray paint

The Tshirt should be pre-washed according to the fabric spray paint instructions. Once you are ready, prepare a pasty flour-water mixture. Put that mixture into the zippy bag and cut a small hole into one of the bottom corners. Now, just like a baker would, squeeze the paste through the small hole to create a design on your Tshirt. Once you are done, lay it out in the sun to completely dry. When it's dry (the flour paste should be rock hard) get out your fabric paint. You can use one color or several colors; and start spraying it all over the design on your shirt. Let it dry in the sun again.

And now comes the fun part: gently peel off all the flour paste from your Tshirt.

Summer Project - Stepping Stones

This type of project never gets old for our kids. I am sure most of you have done these before, but I just wanted to share a couple of things we have done a bit differently this time.

Most online how-to's tell you to use hardware store concrete mixes. Well, while this is fine, you basically need to put on a haz-mat-suit before you start. So, I searched around a little and found this art plaster at Joann's: It's non-toxic. I bought a 5 pound package. It costs about 9 dollars (compared to 2$ for a bag of concrete), but you can easily use one of your 40% or 50% off coupons, since I don't think this stuff ever goes on sale. The entire package was enough for 6 stepping stones (no left-overs). The biggest plus, but minus at the same time, is the time it takes this plaster to set. We had a pretty hot day and I think it took no more than 4 minutes and the material became too hard to push the decorations in. So, once you pour it you need to be very quick with decorating. But, your kids will have almost instant gratification!


We used two different kinds of disposable aluminum cake pans as molds. I really like the ones with the scalloped edges. Those came from Target.

For decorating we used LOTS of glitter, buttons, sea shells, marbles, beads. I have never used glitter before for stepping stones. As expected, not all the glitter stuck to the plaster and threatened to fall off. So, I simply sprayed two layers of clear coat on it.

The stepping stones look awesome, when the sun-light hits them. Super sparkly and shiny ;-)

Summer Project - Birdhouses

Wow, it's been quiet around here! I am so behind documenting what I have been working on over the past months and also catching up on the fun things happening on the blogs in my reader.

Also, for today I have not much, but just a quick and cute project suitable for a 100+ degree or rainy day.

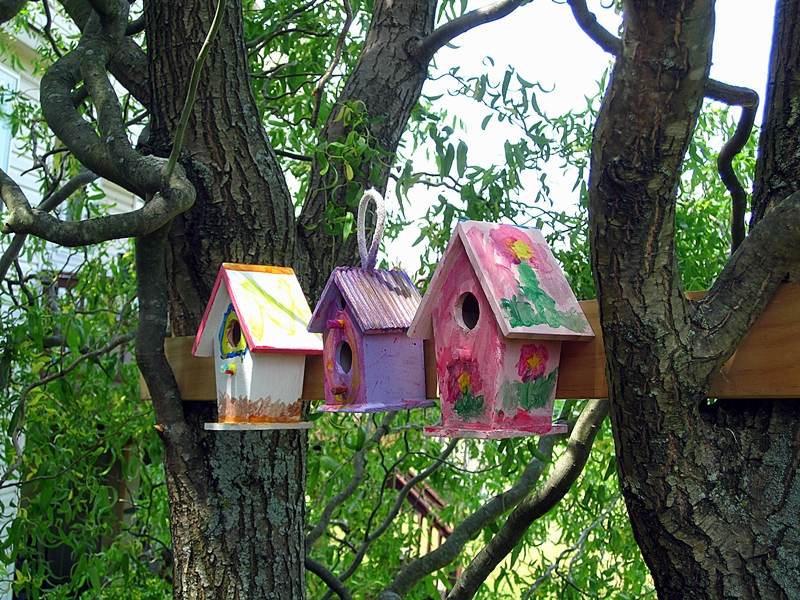
I let the kids pick their favorite 1$-Birdhouse at Joann's. They have at least 5 different kinds to chose from for 1$. They are not intended for birds to actually nest in them, but please don't tell my kids...;-)

We spray-painted ours with an indoor/outdoor paint first. Then the kids used regular washable kids paint to decorate theirs. After letting it dry I applied a clear coat, so they would be suitable for outdoors.

Once all this was done, I simply screwed all three onto a board and stuck the board into our corkscrew willow. Simple one of a kind decoration! And who knows, maybe some kind of creature will even make them their home ;-)

LinkWithin

Blog Widget by LinkWithin