Showing posts with label Tops. Show all posts

Chevron Outfits

A few months back I bought several different colors of Riley Blake's Chevron fabric, never really knowing what to make from it.
Then, I was so excited when "Project Run and Play" announced that one of the challenges would involve said fabric. My plan was to wait and see what the awesome contestants would come up with and then use their ideas as my inspiration. But, alas! Inspiration struck yesterday all on it's own! I found this lonely dark grey polkadotty pillow case and figured it might go well with the grey and white chevron.

I decided to make a striped skirt with a shirred waiste. That was it, no more. But, sometimes, when you have an idea but no real plan things will turn out different than you thought.

I used 6 inch wide strips for the skirt; four of each fabric and shirred the top with seven rows. Even after seriously steaming the shirring for a LONG time, the skirt was way too wide.

So, I decided to add a belt. The belt is about 1 inch wide, has a 4 inch elastic section in the back and closes up with a button in front.

After that, the pictured model requested a shirt to go with it. Never mind that I only had 8 inches of the chevron fabric left, and none of the pillow case. After much thinking, I took a plain white shirt and added ruffles to the top of each sleeve and sewed on a little red button in front to match the bigger ones on the belt.

Love the pockets!
I think, the whole outfit came together quite nicely. Now, I am off to make the second one.
 
Update:
 
The second outfit is done, too. Along the way I added two more belt loops on the front of both skirts and also added a triangle to cover the deep V-neck on the T-shirts. They look much cuter now and tie the outfit together.


Summer Project - Design your own Tshirt

This was another fun project we did with the kids recently. First time I have used this technique was about 7 years ago, when I made matching shirts for Yanic, my hubby and myself. Totally cheesy, I know.

Anyway, Yanic still remembers the shirts and wanted to make one by himself. The original tutorial can be found here.

Here is what you need:
- a new white (or very light colored) Tshirt
- piece of cardboard to fit inside the shirt, so the paint does not seep through
- some flour
- sandwich zippy bag
- fabric spray paint

The Tshirt should be pre-washed according to the fabric spray paint instructions. Once you are ready, prepare a pasty flour-water mixture. Put that mixture into the zippy bag and cut a small hole into one of the bottom corners. Now, just like a baker would, squeeze the paste through the small hole to create a design on your Tshirt. Once you are done, lay it out in the sun to completely dry. When it's dry (the flour paste should be rock hard) get out your fabric paint. You can use one color or several colors; and start spraying it all over the design on your shirt. Let it dry in the sun again.

And now comes the fun part: gently peel off all the flour paste from your Tshirt.

All caged up - Tunic

Sometimes I wish I could do just that, so the kids can't turn the house up side down.... ;-)
I can't even tell you for how long I had this fabric in my stash. Never really knew what to do with it. But then, yesterday somehow it all came together.

Recently, I saw this tutorial for the Chevron Top at Everyday Chaos. So, this became my inspirational starting point.

I embellished the front with hand-dyed lace.

And added slits on the side for more wiggle-room.

The tops do fit a bit tight over shirts, but I think they will be just fine by itself during the summer.

Reversible pants and tank top

Got something done again! Yeah!
My girls barely every want to wear pants, so this one was kind of hit or miss. I sold them to the girls as Princess Jasmine pants. So, that worked.

The pants are reversible, but I do not think we will ever turn them inside out. I followed this tutorial from I Make Stuff For Fun. The tutorial is very nice and easy to follow. Just make sure you add enough inches to the top of your pants. I had to find out the hard way. You see, I actually made three pairs of pants. The first one turned out a size too small for the girls. I think, I might put it into my shop, once I finish the belt for it.

So, here a few more shots. I really like the cute pockets in back.


Each will have a matching tank top, too. Only one is done so far, but the second is already cut and ready to be sewn up. I simply used another tank top as a template to cut the pattern for these. And guess what ?! The purple border?!: FOE!!!!

Yes, the girls are barefoot. We have been in the upper 70s! Unheard of for this time of year. I am loving it.

Rompers

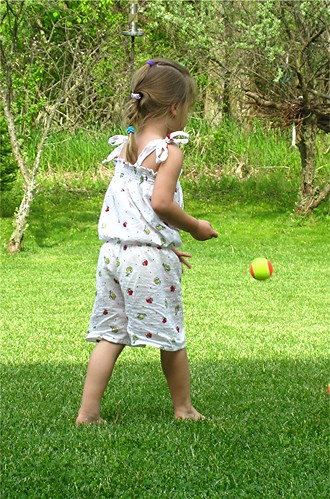
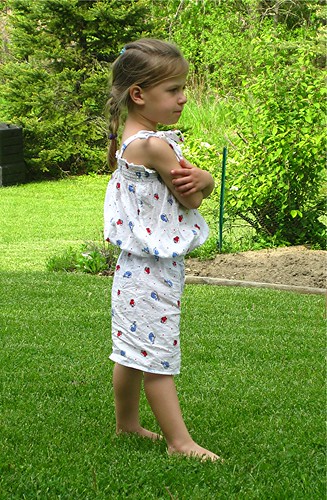
Thanks to Adrianna from Crafterhours I have a new favorite summer outfit (for the girls, of course). Rompers!

Aren't they cute?!

I had left over swiss dot fabric from the Princess Bella dresses I made earlier this year. Adrianna says, you need up to one yard for these rompers. I had 2/3 of a yard for each of them and it was enough for a size 5.


Make sure to stop by Adrianna's and Susan's blog. They are both very talented and have many great tutorials. Also, make sure to enter this year's Skirt Week contest!


crafterhours

Happy New Year

Wow, can't believe it's 2011 already.
I never got around to showing a few more things I made for Christmas gifts "last" year. This past week was just very busy with Hockey Tournements, activities and cleaning.
And, I didn't even take pictures of everything. So, here are just two of things I made. The shirt for Yanic in his Team colors.

One sleeve has his number appliqued and the other the Team Logo. I used organic cotton jersey for this shirt. It's the softest jersey I have used so far. Very comfy.

Then, the girls got these Hello Kitty towel sets from one of their aunts for Christmas. Each set came with two wash towels. Since, we have wash towels galore at our house already, I decided to turn the bath towels into hooded towels.

My first! I know..., but better late than never. Thanks, Lauranie, for the tips on how to make them you gave me a while back.

That's all for today. I am working on a cute little crafting/sewing tutorial for you all. Hope to have it done tomorrow.
Until then.

Some 70's Inspiration

... or, Back-to-school-outfits.
... or, Yes, I am still here!
... or, Yes, I still do sew!
... or, Yes, we have been having a great summer!

Can't believe it's been over a month that I have posted last. I am greatful, that once in a while people still stop by and take a look around here, on this non-happening blog.

I have been making quite a few more skirts and dresses for my girls. I will spare you the pictures, since summer sewing is over anyway and instead show you the girls' new Back-to-school outfits. They have also been called "back-to-bed" and "running-with-the-bulls" Outfits....
For these, I was inspired by: the training pants of my gymnastics coach, when I was about 7 years old. Look:


So, here is what I came up with. Pants and shirt sets.

I used super soft and stretchy cotton jersey knit which I got on sale at http://www.fabric.com/, combined with some owl-jersey from Joann's. No patterns were used, just did some eyeballing of their current size. Instead of the conventional elastic waist I made a wide and comfy yoga-band. Similar to how I made my summer skirt. The girls love it.

The sleeves are a little long right now. But, I think in a couple of months they will be just fine. This owl-fabric is really cute. If you have a Joann's around, hurry up. I think it's a pretty hot commodity.
... all done posing. Give us our candy, now!

Just three more weeks of summer, then school will start again! Luckily, we are still having the most beautiful weather: nothing less then mid 80s all the time! I am loving it.
I will be back soon (Promise!) with some pictures of a quilt I am working on right now.
Until later.

LinkWithin

Blog Widget by LinkWithin