Sometimes I wish I could do just that, so the kids can't turn the house up side down.... ;-)
I can't even tell you for how long I had this fabric in my stash. Never really knew what to do with it. But then, yesterday somehow it all came together.
Recently, I saw this tutorial for the Chevron Top at Everyday Chaos. So, this became my inspirational starting point.
I embellished the front with hand-dyed lace.
And added slits on the side for more wiggle-room.
The tops do fit a bit tight over shirts, but I think they will be just fine by itself during the summer.
Showing posts with label Kindershop. Show all posts
A special little doll
I know, I promissed the tutorial for THE dress with my next post.
Yeah, I am still working on it. I took pictures and everything, but still have to write it all up. Here's a little sneak peak at the dress(es) that you will see in the tute...
You like? 'kay, then come back in a couple of days and I will have the tutorial up.
Until then, here is a pic of a very special custom order I just finished.
Isn't she cute?! When she saw her, Anika said: " Mama, she is smiling at me. I think she wants me. Can I have her?" Sorry, no. She will go to a little girl who is being adopted from Africa and will have this super cute nursery.
Yeah, I am still working on it. I took pictures and everything, but still have to write it all up. Here's a little sneak peak at the dress(es) that you will see in the tute...
You like? 'kay, then come back in a couple of days and I will have the tutorial up.
Until then, here is a pic of a very special custom order I just finished.
Isn't she cute?! When she saw her, Anika said: " Mama, she is smiling at me. I think she wants me. Can I have her?" Sorry, no. She will go to a little girl who is being adopted from Africa and will have this super cute nursery.
![]() |
| http://www.beyond-bedding.com/red-and-white-baby-girls-ladybug-polka-dot-crib-bedding-set.html |
*** SALE ***
Cyber Monday Sale.
Use Coupon Code CYBER15 during check out in either of my Etsy shops for a 15% discount. Discount applies to anything and everything in my shops. EVERYTHING!!!!
Kindershop
KAY-Kreative
This coupon will be good through 11:59 p.m. EST tonight.
Happy shopping. And check out all the other great sales on Etsy as well.
Use Coupon Code CYBER15 during check out in either of my Etsy shops for a 15% discount. Discount applies to anything and everything in my shops. EVERYTHING!!!!
Kindershop
KAY-Kreative
This coupon will be good through 11:59 p.m. EST tonight.
Happy shopping. And check out all the other great sales on Etsy as well.
Make it Fit
Hi Everybody!
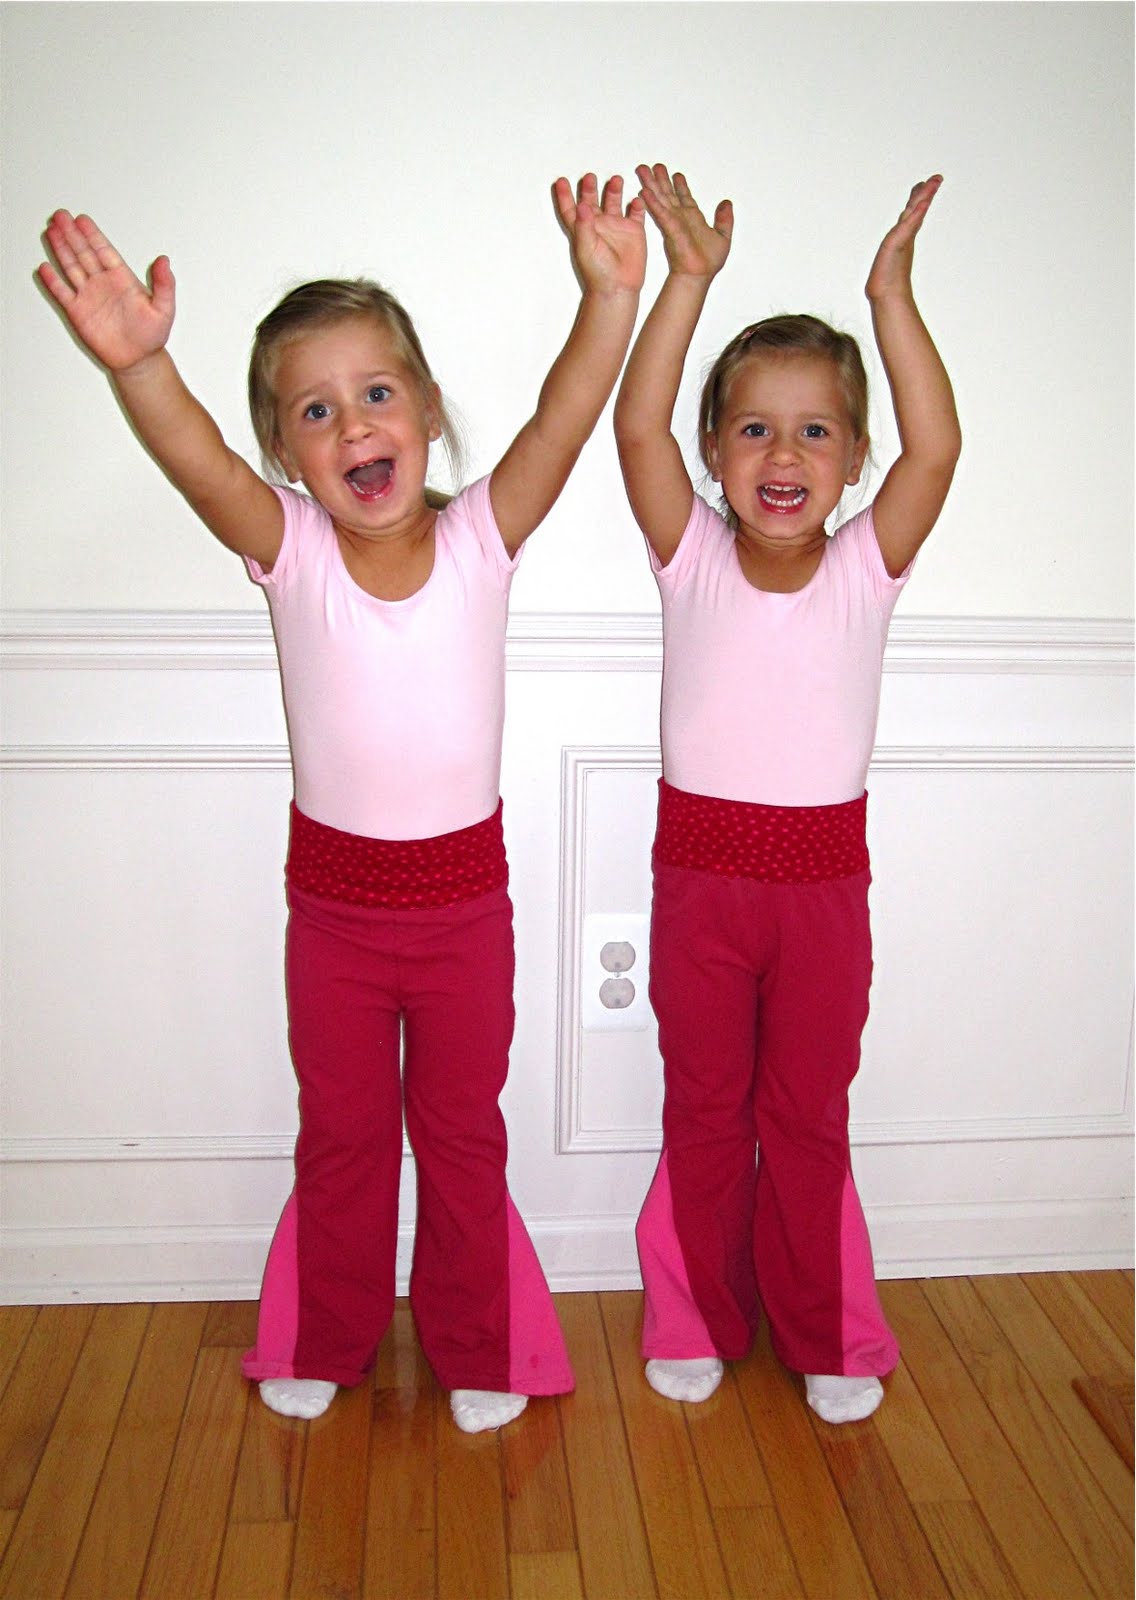
Before I get to the point I wanted to share a couple of pictures of another set of pants I made for the girls. I used the same pattern I had drawn up for the other set I recently made.
Already! Now, the main point of this post.
I am not sure what to think of it, but my girls grew two sizes in less than a year. 3Ts were a perfect fit in the spring and now they need 5Ts! Money is tight, so I have to figure out ways to extend the life of as much of their old clothing as possible.
Here is an easy way to do just that with regular stretch pants. Stretch pants that are too short on both ends.
To replace the waist I cut the existing waist band off, including the elastic and replaced it with a folded knit band. I used the same technique as for my summer skirt and the stretch knit pants from above and this post.
And to lengthen the legs I simply added a double-folded band of the same knit fabric I used for the waist band. Voila! 20 min and a new pair of pants!
Before I get to the point I wanted to share a couple of pictures of another set of pants I made for the girls. I used the same pattern I had drawn up for the other set I recently made.
And a custom order I just finished. An extra long owls and hearts garland. I think it came out really cute.
Already! Now, the main point of this post.
I am not sure what to think of it, but my girls grew two sizes in less than a year. 3Ts were a perfect fit in the spring and now they need 5Ts! Money is tight, so I have to figure out ways to extend the life of as much of their old clothing as possible.
Here is an easy way to do just that with regular stretch pants. Stretch pants that are too short on both ends.
To replace the waist I cut the existing waist band off, including the elastic and replaced it with a folded knit band. I used the same technique as for my summer skirt and the stretch knit pants from above and this post.
And to lengthen the legs I simply added a double-folded band of the same knit fabric I used for the waist band. Voila! 20 min and a new pair of pants!
First Christmas Presents DONE !
YES, that's right! I am way ahead of my time. Never mind that Halloween is WAY too soon for comfort ("Princerella", Witch and Indiana Jones costumes waiting to be made).
But, inspiration struck when one day I saw the beautifully whimsical creations Marysia is posting about on a regular basis. Just look at this gorgeous quilt she made together with her blog readers.
And this is what made me run to get fabric and scissors. Isn't it cute? It's a Pyjama Keeper! Awesome, right?! I think this almost falls into the category of "Things you never knew you needed". But, let me tell you, YOU really do need it if you have Pre-schoolers who drop their PJs anywhere in the house, except on their bed. See!
So, here are my versions. The girls are in LOVE with Kailan right now and can't pass anything up that has Hello Kitty on it.
They are kind of like 3D-Wall Hangings and are supposed to be tied to either the headboard or foot end of the bed. And those huge oversized elastic pockets will hold the pyjamas. I am totally envisioning no more laying around night time clothing... Or, they will just turn into another stuffed animal holder. Only time will tell.
The characters are both copied from images I found on the internet. It's pretty easy. All you need is an image at a scale of 1:1 with as little fancy detail as possible. Trace all the different shapes from that image onto fabric or felt, cut and re-assemble on your quilt (shirt, jacket, bag, etc.).
It was fun making these and I made a few extra. Two are already in the shop. More will come soon.
Have a wonderful week.
But, inspiration struck when one day I saw the beautifully whimsical creations Marysia is posting about on a regular basis. Just look at this gorgeous quilt she made together with her blog readers.
And this is what made me run to get fabric and scissors. Isn't it cute? It's a Pyjama Keeper! Awesome, right?! I think this almost falls into the category of "Things you never knew you needed". But, let me tell you, YOU really do need it if you have Pre-schoolers who drop their PJs anywhere in the house, except on their bed. See!
So, here are my versions. The girls are in LOVE with Kailan right now and can't pass anything up that has Hello Kitty on it.
The characters are both copied from images I found on the internet. It's pretty easy. All you need is an image at a scale of 1:1 with as little fancy detail as possible. Trace all the different shapes from that image onto fabric or felt, cut and re-assemble on your quilt (shirt, jacket, bag, etc.).
It was fun making these and I made a few extra. Two are already in the shop. More will come soon.
Have a wonderful week.
Paper Doll Play Sets
Do you remember cutting out and playing with paper dolls when you were little?! I do. And it was so much fun.
So, I was really happy to come across this Blue Hills paper doll fabric a while back. It's perfect to make the cutest sets of fabric paper dolls. And paired with a quilted carrying case it's sure to be a favorite for traveling and riding in the car. The best part: They won't rip or tare!
The girls love their sets. I backed the dolls with super stiff interfacing and the clothes with fusible fleece.
There are a few extra sets in the shop right now and a few more are cut out and ready to be assembled. They will be added to the shop later.
Wouldn't these be great as Holiday gifts? So, go and grab one! ;-)
So, I was really happy to come across this Blue Hills paper doll fabric a while back. It's perfect to make the cutest sets of fabric paper dolls. And paired with a quilted carrying case it's sure to be a favorite for traveling and riding in the car. The best part: They won't rip or tare!
The girls love their sets. I backed the dolls with super stiff interfacing and the clothes with fusible fleece.
There are a few extra sets in the shop right now and a few more are cut out and ready to be assembled. They will be added to the shop later.
Wouldn't these be great as Holiday gifts? So, go and grab one! ;-)
Winner of the "Anika" skirt pdf pattern
Thank you so much for all your nice comments and thanks for still checking in after these few months of almost non-posting.
But, I am afraid summer is not going to become any more interesting around here. I will be spending lots and lots of time outside. However, I am sure I will have some sewing going on here and there. Like this past weekend: I had three projects going at the same time: 2 more summer dresses for the girls, a sleep sack for a soon-to-be-baby and a baby blanket for the same baby.
The baby items are done and one dress as well. The other dress will get done tomorrow (maybe...).
But, now our winner of the "Anika Twirl Skirt with attached Zippered Purse": It's numero 3!!!!
Congratulations, Mama Lusco!!!! I will be mailing you the pattern soon.
For everyone else, who would like to try the pattern; it will be available in the shop tomorrow morning.
Have a great start of the week. It will be our first week of Summer Break!
But, I am afraid summer is not going to become any more interesting around here. I will be spending lots and lots of time outside. However, I am sure I will have some sewing going on here and there. Like this past weekend: I had three projects going at the same time: 2 more summer dresses for the girls, a sleep sack for a soon-to-be-baby and a baby blanket for the same baby.
The baby items are done and one dress as well. The other dress will get done tomorrow (maybe...).
But, now our winner of the "Anika Twirl Skirt with attached Zippered Purse": It's numero 3!!!!
Congratulations, Mama Lusco!!!! I will be mailing you the pattern soon.
For everyone else, who would like to try the pattern; it will be available in the shop tomorrow morning.
Have a great start of the week. It will be our first week of Summer Break!
1,000 DONE AND FINISHED
I DID IT!!!
ALL ONE THOUSAND NAMETAGS ARE FINISHED!!!! (Sorry, for screaming, but I am so excited and relieved.) Here is a picture of the last 70 tags, I just finished.
Thank you Kristin at BBD Supplies for the felt flowers and circles. Couldn't have done it without you and all of YOU my friends who have cheered me on. Thank you!
So, let's celebrate by having a little GIVE AWAY!. Yeah! Remember, the little sneak peak I gave you in my last post?!
I think, this little pocket belongs to one of the cutest things I have made so far. I know, I say that quite often, but I really like it and I have received more inquiries on it and the girls have received more compliments on this design, than on any others before.
It's my new "Anika Twirl Skirt with attached zippered Purse". You like???
If you do, you can win a copy of the pattern before it goes on sale in my Etsy store. The pattern is for sizes 2T - 5T and includes a very detailled pictured tutorial and pattern pieces for the purse. The Purse is the highlight of the pattern. My girls LOVE it! It holds their Chap sticks, sun glasses, hair clips and typically numeruous trinkets. It's even big enough to carry a Beanie-Baby-size stuffed animal.
The pattern is a real playground for mixing and matching different fabric prints. Everything goes. The only limit is your imagination.
So, if you like to win a copy of the pattern, simply leave a comment on this post and tell me how much you love the skirt ;-) Just kidding, just tell me what you are working on right now, or what your next project will be, or maybe you have a link to a new tutorial that you really like. Or, just tell me where you will go on vacation this year!
Good luck. I will be picking a winner sometime at the end of the week.
BTW, the pink skirt in above picture is for sale right here.
ALL ONE THOUSAND NAMETAGS ARE FINISHED!!!! (Sorry, for screaming, but I am so excited and relieved.) Here is a picture of the last 70 tags, I just finished.
Thank you Kristin at BBD Supplies for the felt flowers and circles. Couldn't have done it without you and all of YOU my friends who have cheered me on. Thank you!
So, let's celebrate by having a little GIVE AWAY!. Yeah! Remember, the little sneak peak I gave you in my last post?!
I think, this little pocket belongs to one of the cutest things I have made so far. I know, I say that quite often, but I really like it and I have received more inquiries on it and the girls have received more compliments on this design, than on any others before.
It's my new "Anika Twirl Skirt with attached zippered Purse". You like???
If you do, you can win a copy of the pattern before it goes on sale in my Etsy store. The pattern is for sizes 2T - 5T and includes a very detailled pictured tutorial and pattern pieces for the purse. The Purse is the highlight of the pattern. My girls LOVE it! It holds their Chap sticks, sun glasses, hair clips and typically numeruous trinkets. It's even big enough to carry a Beanie-Baby-size stuffed animal.
The pattern is a real playground for mixing and matching different fabric prints. Everything goes. The only limit is your imagination.
So, if you like to win a copy of the pattern, simply leave a comment on this post and tell me how much you love the skirt ;-) Just kidding, just tell me what you are working on right now, or what your next project will be, or maybe you have a link to a new tutorial that you really like. Or, just tell me where you will go on vacation this year!
Good luck. I will be picking a winner sometime at the end of the week.
BTW, the pink skirt in above picture is for sale right here.
Twice!!!!
Just a wanted to pop my head in very quickly!
I am very excited: My snail messenger bag was featured in TWO different Treasuries this weekend. Thank you Ladies!
Ca-ute!!! - Elise is playing dress-up
What do you think??!!
Isn't she super cute?!
On one of my latest trips to my fabric store I found a remnant of white and blue gingham. And, instantly, had a vision of the Elise Doll wearing a "real" The Wizard of Oz' Dorothy dress, including red boots and all. I took the Elise pattern, but cut up the front and back dress pieces, the arms, legs and modified the shape of the body. So, all that's really left from the original pattern is the head. I also re-shaped the feet a bit, to make them look a little more like she is wearing shoes.
The sewing part was quite difficult and took a long time. I basically had to work my way down from head to toe. I am surprised how well all the seams matched up in the end. And she is still perfectly baby safe, once you remove the hair ties.
So, if you like her as much as I do and know a little (or big) girl who would love to play with her, you know where to find her!
Isn't she super cute?!
The sewing part was quite difficult and took a long time. I basically had to work my way down from head to toe. I am surprised how well all the seams matched up in the end. And she is still perfectly baby safe, once you remove the hair ties.
So, if you like her as much as I do and know a little (or big) girl who would love to play with her, you know where to find her!
Meet the Testers' Elise Dolls - and receive a Discount
First of, thank you again for the great response to my first pattern. You are all such nice bloggy friends.
All the testers' dolls are in. I love how each one of you put your personal spin on the pattern.
So, first meet Suzanne's Elise:
Don't you just love how comfy she looks in her flannel dress. And it even has sleeves!
Now, here is my dear friend Lauranie's cowgirl:
I don't know how she found the time to test my pattern with all the things she had going on. But, I think she is super cute with her patchy dress and accessories.
And, here is Freda's Suzie Q:
Love her cherry dress. Makes me think of summer....
And, one more! This is Lisa's Elise, all dressed in a Amy Butler designer frock ;-)
Thank you so much everybody for helping me finalize the pattern.
I took everybody's comments into consideration and made a few updates to the pattern files. The pattern is now for sale in my Etsy store. Yippie!
Please go! Get one! You know there are a few girls in your life that would love to get one for Christmas :-)
I know, I will be making more!
I am offering 2$ off the pattern (Sorry, electronic files only. Not for a printed version) for all my blog friends from now until Christmas Eve, December 24th. So, you only pay 4.95$! All you have to do is mention code "2OFF" in the message to seller box. I will send your refund through PayPal right away.
All the testers' dolls are in. I love how each one of you put your personal spin on the pattern.
So, first meet Suzanne's Elise:
Don't you just love how comfy she looks in her flannel dress. And it even has sleeves!
Now, here is my dear friend Lauranie's cowgirl:
I don't know how she found the time to test my pattern with all the things she had going on. But, I think she is super cute with her patchy dress and accessories.
And, here is Freda's Suzie Q:
Love her cherry dress. Makes me think of summer....
And, one more! This is Lisa's Elise, all dressed in a Amy Butler designer frock ;-)
Thank you so much everybody for helping me finalize the pattern.
I took everybody's comments into consideration and made a few updates to the pattern files. The pattern is now for sale in my Etsy store. Yippie!
Please go! Get one! You know there are a few girls in your life that would love to get one for Christmas :-)
I know, I will be making more!
I am offering 2$ off the pattern (Sorry, electronic files only. Not for a printed version) for all my blog friends from now until Christmas Eve, December 24th. So, you only pay 4.95$! All you have to do is mention code "2OFF" in the message to seller box. I will send your refund through PayPal right away.
I made it to the Front Page on ETSY !!!
If you are looking for my SMS giveaway post, click here.
Guess, how excited I am...! -------- T H I S ---------- much!
One of my quilted Memory Games made it to the front page on Etsy. It was in a Treasury picked by Etsy. And because of it I had close to 900 visitors to my Etsy shop last night.
Thank you, ETSY!!!!
Guess, how excited I am...! -------- T H I S ---------- much!
One of my quilted Memory Games made it to the front page on Etsy. It was in a Treasury picked by Etsy. And because of it I had close to 900 visitors to my Etsy shop last night.
Thank you, ETSY!!!!
A Miracle and A Tutorial
The Miracle: John cleaned out his closet without prior bickering on my part and on his own initiative.
In the process he came downstairs with three pairs of cords, ready to throw them into the trash. Luckily, I caught him in time and had the instant idea to repurpose them: into skirts for the girls. Honestly, these are the cutest skirts I have made in a while and they cost me NOTHING! (Well, let’s say, I didn’t have to go out to buy anything for this project.)
So, here comes a little tutorial, showing what I did. You can use cords or basically any adult pair of pants that has a decent width around the thigh area. Skinny-mini-stretch-pants are probably not going to work.
You will need:
1 pair of pants
Approximately 1.5 yards of trim
¾ inch elastic
Appliqué or other embellishments (optional)
Matching threads and all those other sewing essentials (sewing machine, scissors, safety pin (to insert elastic), pins, etc.).
1. Turn your pants inside out and cut off the legs just below the crotch. If your pants have back pockets make sure not to cut into those, since we will reuse them. The top of the legs (widest part) will become the bottom of the skirt. If you have back pockets use a seam ripper to carefully remove them.
2. Cut away the inner leg seams on each of the legs (see pic).
And open them up (one will be the front and the other the back of your skirt). Lay both together right sides facing matching all edges. If they are not, trim to make them equal. (Sorry, no pic. Just imagine two big trapezoids laying on top of each other, just like a pattern for an A-line skirt: wide on the bottom, tapering towards the top).
3. Now we need to cut away on the top in order to make the skirt fit your girl. I measured my skirts to fall below the knee. My girls are almost a 4T and the skirt when finished should be about 11.5 inches long. So, the calculation goes as follows: 11.5” + 1” for bottom hem + 1.5” for elastic casing = 14” = height of the two skirt pieces.
My front and back were about 25” wide at the bottom and 22” at the top. This gives the skirt a nice twirl.
If you are making a different size than a 4T, here are my recommendations for how long the skirt should be compared to the height of your fabric pieces:
Finished Length/Length (height) to cut
2T: 9.5”/12”
3T: 10.5”/13”
5T: 12.5”/15”
4: 14.5”/17”
5: 15.5”/18”
6: 17”/19.5”
Because regular cord is so thick and heavy I would not recommend to go any smaller than a 2T
4. Sew your two pieces together on the short ends, the side seams.
5. Fold the bottom edge over ½ inch to the inside and ½ inch again for the bottom hem and pin in place (see pic).
6. Fold the top edge over ½ inch and 1 inch again to form the casing for the elastic. Pin in place.
7. Sew the bottom hem. Sew the casing at the top close to the lower folded edge leaving an opening of about 1.5 inch for inserting the elastic later on. See pic
8. I now added a ½ wide woven Matryoshka trim around the lower edge. You could use any kind of ribbon or trim you like.
9. If you decided to add one or two of the pockets, pin them in place to the left and right of the front center. See pic. Sew in place following the same double-seam that they were attached by on the pants.
I also added an appliqué to the pocket. If you have a sew-on, attach it before pinning the pocket to the skirt. An iron-on can be added at the end. Sew pocket in place.
I used a contrasting red thread to attach the pockets. Gives it another interesting little detail.
10. Insert Elastic. My girls have a 19.5” waist. Due to the cord being very heavy and it stretching the elastic inside the casing, I cut my elastic pieces about 17.5” long. You may have to experiment with the length a bit to see what fits best.
Using the safety pin insert elastic, overlap the two ends by 1 inch and sew together. Stitch the 1.5” opening close.
Congratulations you are all done and have just made another cutesy skirt. And you have been a little bit “green” in the process. How great is that! If you have any questions or trouble understanding my instructions, comment in this post or send me an email. I will be happy to help.
And don't you just love those cute Matryoshka iron on patches I added to the pockets?! They are so darn cute. They will be available in my Etsy shop later tonight. Super easy to use: just peel off paper, place on fabric and iron on for 15 seconds. No sewing required!
In the process he came downstairs with three pairs of cords, ready to throw them into the trash. Luckily, I caught him in time and had the instant idea to repurpose them: into skirts for the girls. Honestly, these are the cutest skirts I have made in a while and they cost me NOTHING! (Well, let’s say, I didn’t have to go out to buy anything for this project.)
So, here comes a little tutorial, showing what I did. You can use cords or basically any adult pair of pants that has a decent width around the thigh area. Skinny-mini-stretch-pants are probably not going to work.
You will need:
1 pair of pants
Approximately 1.5 yards of trim
¾ inch elastic
Appliqué or other embellishments (optional)
Matching threads and all those other sewing essentials (sewing machine, scissors, safety pin (to insert elastic), pins, etc.).
1. Turn your pants inside out and cut off the legs just below the crotch. If your pants have back pockets make sure not to cut into those, since we will reuse them. The top of the legs (widest part) will become the bottom of the skirt. If you have back pockets use a seam ripper to carefully remove them.
2. Cut away the inner leg seams on each of the legs (see pic).
And open them up (one will be the front and the other the back of your skirt). Lay both together right sides facing matching all edges. If they are not, trim to make them equal. (Sorry, no pic. Just imagine two big trapezoids laying on top of each other, just like a pattern for an A-line skirt: wide on the bottom, tapering towards the top).
3. Now we need to cut away on the top in order to make the skirt fit your girl. I measured my skirts to fall below the knee. My girls are almost a 4T and the skirt when finished should be about 11.5 inches long. So, the calculation goes as follows: 11.5” + 1” for bottom hem + 1.5” for elastic casing = 14” = height of the two skirt pieces.
My front and back were about 25” wide at the bottom and 22” at the top. This gives the skirt a nice twirl.
If you are making a different size than a 4T, here are my recommendations for how long the skirt should be compared to the height of your fabric pieces:
Finished Length/Length (height) to cut
2T: 9.5”/12”
3T: 10.5”/13”
5T: 12.5”/15”
4: 14.5”/17”
5: 15.5”/18”
6: 17”/19.5”
Because regular cord is so thick and heavy I would not recommend to go any smaller than a 2T
4. Sew your two pieces together on the short ends, the side seams.
5. Fold the bottom edge over ½ inch to the inside and ½ inch again for the bottom hem and pin in place (see pic).
6. Fold the top edge over ½ inch and 1 inch again to form the casing for the elastic. Pin in place.
7. Sew the bottom hem. Sew the casing at the top close to the lower folded edge leaving an opening of about 1.5 inch for inserting the elastic later on. See pic
8. I now added a ½ wide woven Matryoshka trim around the lower edge. You could use any kind of ribbon or trim you like.
9. If you decided to add one or two of the pockets, pin them in place to the left and right of the front center. See pic. Sew in place following the same double-seam that they were attached by on the pants.
I also added an appliqué to the pocket. If you have a sew-on, attach it before pinning the pocket to the skirt. An iron-on can be added at the end. Sew pocket in place.
I used a contrasting red thread to attach the pockets. Gives it another interesting little detail.
10. Insert Elastic. My girls have a 19.5” waist. Due to the cord being very heavy and it stretching the elastic inside the casing, I cut my elastic pieces about 17.5” long. You may have to experiment with the length a bit to see what fits best.
Using the safety pin insert elastic, overlap the two ends by 1 inch and sew together. Stitch the 1.5” opening close.
Congratulations you are all done and have just made another cutesy skirt. And you have been a little bit “green” in the process. How great is that! If you have any questions or trouble understanding my instructions, comment in this post or send me an email. I will be happy to help.
Lots of Patchy Scarfs
I am making progress on my Christmas Gifts List. I mean, I am no where close to being done, but it's nice to at least mark off a couple of things:
I started making a few patchy scarfs, for the shop, for the girls and some as gifts. The ones for the shop have nice cozy pockets:
Anika's and Kordula's are made from Michelle's Shade Garden fabric and have cute little owl appliques. I also added a loop for hanging them:
And here a couple of Christmas gifts with Valori Wells' Olive Rose Posies in two different shades:
I really like making these. They are relatively quick to sew up and I am in love with this super soft fabric I found at Joann. It's called "Soft & Fluffy" and comes in white, brown, fuchsia, light blue and black at our store. It's much, much softer than fleece or minky fabric. You should try it.
If you are planning on making these kind of scarfs yourself, I found that for the child sizes a finished width of 4.5" and length of about 56" is optimal. My adult sizes are 6.5" wide and 60" long (width of the backing fabric).
I started making a few patchy scarfs, for the shop, for the girls and some as gifts. The ones for the shop have nice cozy pockets:
I really like making these. They are relatively quick to sew up and I am in love with this super soft fabric I found at Joann. It's called "Soft & Fluffy" and comes in white, brown, fuchsia, light blue and black at our store. It's much, much softer than fleece or minky fabric. You should try it.
If you are planning on making these kind of scarfs yourself, I found that for the child sizes a finished width of 4.5" and length of about 56" is optimal. My adult sizes are 6.5" wide and 60" long (width of the backing fabric).
Subscribe to:
Posts (Atom)